Revolutionize Your Daycare Experience with Parent™
Introducing Parent™ Childcare App
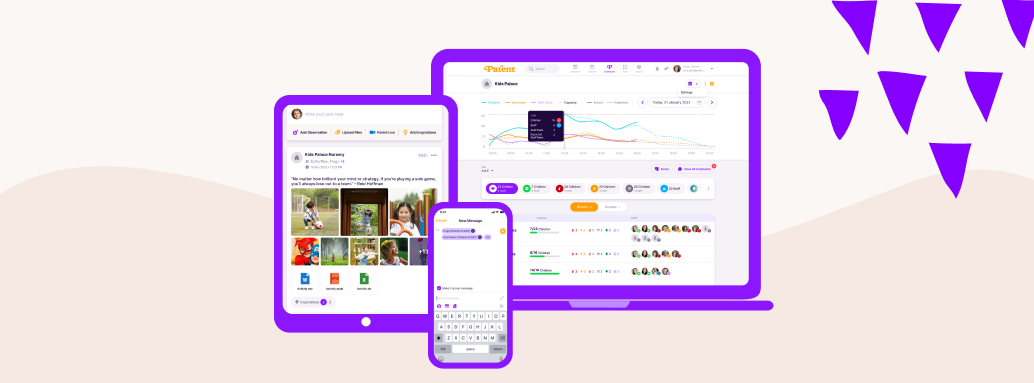
Imagine a world where managing your child's daily activities, staying connected with caregivers, and ensuring their safety and development becomes effortless. With Parent™ Childcare App, this vision becomes a reality. The integration of digital tools in education has opened new avenues for communication, making it more direct and instantaneous. Parent™️ app stands out as an innovative solution designed to meet this need, offering a comprehensive platform for educators and parents to connect, share, and collaborate for the betterment of students' academic journeys. In this article, we will explore the features and benefits of Parent™, revolutionizing the way parents engage with their child's early education and development.
Benefits of Using Parent App
-
User-Friendly Interface
Parent™ boasts a user-friendly interface designed with simplicity and ease of use in mind. Its intuitive design ensures that parents can navigate the app effortlessly, even if they are not tech-savvy. The app's customizable settings allow parents to tailor their experience according to their preferences, making it a truly personalized tool for childcare management.
-
Daily Schedules and Reminders
Creating and managing daily routines is crucial for a child's development. With Parent™ parents can easily create and customize schedules for their child's activities. From meals and nap times to playtime and learning sessions, every aspect of the child's day can be planned and organized seamlessly. The app also provides reminders for important activities, ensuring that parents never miss a beat.
-
Secure Communication and Updates
Keeping parents connected with caregivers is an essential aspect of Parent™. The app enables instant messaging between parents and caregivers, allowing them to communicate efficiently and share important updates. Whether it's a picture of their child's artwork or a video of their first steps, parents can stay updated with their child's progress while ensuring privacy and confidentiality.
-
Attendance Tracking and Check-In/Out
Tracking a child's attendance and managing drop-off and pick-up processes can be a challenging task. Parent™ simplifies this process by providing an attendance tracking feature. Parents can easily check their child in and out, ensuring accuracy and accountability. This feature also enhances the overall security of the childcare facility, giving parents peace of mind.
-
Health and Well-being Monitoring
Parent™ goes beyond managing schedules and attendance; it also prioritizes the child's health and well-being. Parents can record and monitor their child's health information, including allergies and medication schedules. Caregivers can access this information promptly, ensuring that the child receives proper care when needed. With the app's integrated health features, parents can rest assured that their child's health is well-monitored.
-
Learning and Development Resources
Promoting a child's cognitive and social development is at the heart of Parent™. The app offers access to a wide range of educational materials and resources suitable for different age groups. From interactive games and activities to age-appropriate learning materials, the app fosters an environment conducive to learning and growth, even outside the childcare facility.
-
Financial Management Tools
Managing childcare expenses and payments can be a daunting task for parents. Parent pay simplifies financial management by providing tools to track expenses and generate invoices and receipts. Parents can easily monitor their financial commitments and ensure a transparent and hassle-free payment process. With these financial management features, parents can focus on their child's well-being without worrying about administrative burdens.
-
Collaboration and Parental Involvement
Building a strong partnership between parents and caregivers is crucial for a child's holistic development. Parent™ encourages collaboration and parental involvement through its interactive platform. Parents can engage in discussions, share insights, and collaborate with caregivers and other parents, creating a supportive community that nurtures the child's growth.
-
Data Security and Privacy
Parent™ understands the importance of data security and privacy. The app ensures that all user data is encrypted and protected, complying with privacy regulations. Parents can trust that their personal information and their child's data are safeguarded at all times, providing a secure environment for their family's information.
-
Compatibility and Accessibility
Parent™ Childcare App is designed to be accessible to parents on various platforms. Whether they prefer iOS, Android, or web-based applications, the app is available across multiple devices. Its responsive designand optimized interface ensure a seamless user experience regardless of the device or screen size. Parents can access the app anytime, anywhere, making it convenient and flexible to manage their child's childcare needs.
-
Customer Support and Assistance
Parent™ values its users and provides exceptional customer support. Parents can rely on a responsive customer support team that is readily available to address any technical issues or inquiries they may have. The app continuously strives for improvement based on user feedback, ensuring that parents have the best possible experience while using the app.
-
Cost and Subscription Options
Parent™ offers different subscription plans to cater to the varying needs of parents. The app provides transparent pricing information, allowing parents to choose a plan that suits their requirements and budget. With its value for money in terms of features and benefits, Parent™ proves to be an investment in their child's early education and development.
-
Testimonials and User Reviews
The satisfaction and positive experiences of other parents speak volumes about the effectiveness of Parent™. The app showcases testimonials and user reviews, sharing real-life stories of parents who have benefited from using the app. These testimonials build trust and credibility, giving parents the confidence to explore and embrace Parent™.
-
Future Updates and Enhancements
Parent™ is committed to continuous improvement and staying ahead of the curve. The app promises regular updates that incorporate new features and functionalities based on user feedback and industry trends. Parents can look forward to an evolving app that caters to their changing needs, providing an enhanced experience for their childcare journey.
Our solution streamlines and improves communication in a single, secure, and up-to-date platform, accessible anywhere. Automating tasks taking time away from caring for kids, we let carers make a true difference in the lives of the little ones, simply by making their workdays smarter, easier, and more meaningful.
Check the links below to learn more about the best childcare app for your daycare center...
Now, let's explore the main features of Parent™️ App:
1. Zoom Integration
Schedule meetings using Zoom directly from your Parent account
Login to your Parent Account
Choose an Institution
Click on the name of the institution in which you would like to schedule a meeting.
Click on the Tools icon then select the Show button below the Integrations icon.
Choose the Zoom Integration option then select the Log into Zoom button.
-
You will be directed to the Zoom log-in page where you need to put your login information. Your Parent and Zoom accounts are now connected and you can start adding meetings.
Create a Zoom Meeting Event
To create an event with a Zoom meeting, follow these steps.
-
Click on the Calendar icon
-
Click on the Create event button
-
Add all the event details
-
Toggle Make it a Zoom meeting to on
Save the event and it will be added to the Parent calendar. At the time of the meeting navigate to the calendar and click on Join Zoom Meeting.
Note: The event will also be displayed in the newsfeed along with an option to join the meeting.
To remove the Zoom account from Parent, please follow these steps:
-
-
Click on the Show button below the Integration icon
-
Click on the Zoom Integration
-
2. Parental Permission
to create, view and delete parental permission go to the Parental Permissions page
Click on the Tools icon, then click on the Show button below Parental Permissions.
You will be directed to Create a new permission request.
-
Type the Heading which is the title of the permission you want to create.
-
Choose the Recipients from the list of recipients in your institute. You can choose a certain room or the entire institute.
-
Type a description of the permission you are creating if it needs to be explained.
then click on Add Permission.
On the same Parental Permissions page, there is a list of the created permissions. Scroll down and find the permission you want to view and do the following:
-
Click on the Options (three horizontal dots).
-
Choose the Show Replies option.
You can filter the replies and see who has granted permission and who has denied it.
On the same Parental Permissions page, there is a list of the created permissions. Scroll down and find the permission you want to delete and do the following:
-
Click on the Options (three horizontal dots).
-
Choose the Delete option.
-
When the warning appears click the Yes button.
3. Child Development
If your institute follows one of our supported frameworks it is important for your teachers to make observations, assessments, and two-year progress checks.
Make an Observation
You can make an observation from two places: the newsfeed and the child's profile.
From the Newsfeed
Through the application do the following:
-
Access the newsfeed by pressing the Newsfeed icon.
-
Click the + icon on the bottom right corner of the screen. Note: if you are using the desktop click on the observation tab.
-
-
From the Dashboard choose the class the child is in.
-
Click on the child's picture and select Profile.
-
-
Click on + icon and choose Observation.
Note: if you are on the desktop click New button and select Observation
Once you are on the observation step follow these steps:
-
Select the recipient(s) of the observation.
-
Type the body of the observation being made and add any Next Steps if needed.
-
Upload any files you want to attach to the post by clicking the Attachment button.
-
To add links click on the Links button and select the type of links you would like to add.
-
Choose the subarea you want to add links in and choose the links you want to add to the observation.
-
Note: you can change the date of the observation by selecting the Date field.
Once you have added all the information and links click the Post button.
To make an assessment follow these steps:
-
From the Dashboard choose the class the child is in.
-
Click on the child's picture and select Profile.
-
-
Click on + icon and choose Assessment.
Note: if you are on the desktop click New button and select Assessment.
-
Type the body of the assessment.
-
Click on the different areas of the assessment.
The area you selected will expand and a list of subareas will appear.
-
Select the age band and refinement for each subarea.
-
Attach any files and/or images you want to include with the assessment.
Note: you can change the date of the assessment by selecting the Date field.
Once you have added all the information you want for the assessment, click the Post button.
Make a Two-Year Progress Check
To make a Two-year check follow these steps:
-
From the Dashboard choose the class the child is in.
-
Click on the child's picture and select Profile.
-
-
Click on + icon and choose Two years check.
Note: if you are on the desktop click New button and select Two years check.
-
Type the body of the two-year check.
-
Click on the different areas of the two-year check.
The area you selected will expand and a list of subareas will appear.
-
Select the age band and refinement for each subarea.
-
Attach any files and/or images you want to include with the two-year check.
Note: you can change the date of the assessment by selecting the Date field.
Once you have added all the information you want for the assessment, click the Post button.
Each child in your institute has their own reports for the EYFS framework. To access a specific child's reports you need to follow these steps:
-
From the Dashboard choose the class the child is in.
-
Click on the child's picture and select Profile.
-
-
Click on the Summary button.
Click on the Details button to get a more detailed report for the child and apply filters to the report.
To view reports for your whole institute follow these steps:
-
-
Click on the Show button below the Child Development icon.
You will find a summary that includes how many children are ahead, behind, on track, or without observations.
Detailed Progress report
To view a more detailed report click on the Detailed Reporting button using the website
You can filter the report using the following filters:
-
Show: choose if you want the report to include a detailed percentage or overall for age band.
-
Progress as of: choose the date you want to set as a reference for the report.
-
Gender: choose the gender of the children you want to include in the report.
-
Keyworkers: choose the keyworkers you want to include in the report.
Once you have selected all the filters you want for the report click the filter button.
To view and filter the next steps do the following:
-
-
Click on the Child Development icon.
-
Click the View Next Steps button.
Note: you can filter the report by Key worker, Room, Child, or date.
To bring a child up to speed follow these steps:
-
-
Click on the Show button below the Child Development icon.
-
Click the Detailed Reporting button using the website
-
Scroll down and find the child you want to bring up to speed.
-
Click on the percentage cell in the area you want to bring up to speed.
-
Scroll down to the Bring up to speed button and click on it.
-
A confirmation message will appear, click Ok to confirm the bringing up to speed action.
To print a child's journal, follow these steps:
-
From the Dashboard choose the class the child is in.
-
Click on the child's picture and select Profile.
-
-
Click the Print button and choose Journey.
-
Choose the dates and options of what you want to include in the journey printout.
-
Click the Print button, you will be direct to another tab then choose to save it as a PDF or directly print it.
4. Create, Edit, Print, and Delete Lists
Use your username and password to log in to your Parent account.
Click on the name of the institution you want to create lists for.
Click on the Tools icon and then click on the Show button below Lists.
To create a list, follow these steps:
-
Click the Create List button.
-
Click the Add Column button and choose the information you want to include in your list from the drop down menu.
Choose the filters you want to apply to the list which are:
-
Status: choose if you want to include Current, Upcoming, Withdrawn, or all three statuses for children in the list.
-
Show: choose to filter children using their check-in record for a certain period.
-
Age: choose the age range of the children you want to include in your list.
-
Gender: choose the gender of the children you want to include in your list.
-
Contact Information: choose what information the contact must have to be included in your list. For example, if you want to only include contacts with an email address select the Yes option in the drop down menu under E-mail.
-
Contact Relation: choose to filter the list by contact's relationship to the child.
-
Health Information: Choose to filter the list by the child's health information.
When you are done creating the list, type in the list's name and click the Save button.
You can edit an already existing list by doing the following:
-
Find the list you want to change and click on it or select the Edit option from the Options menu (three horizontal lines) to the right of the list's name.
-
Change the filters, details included, or the list's name.
-
Click the Save button and your list will be updated.
-
Find the list you want to delete.
-
Choose the Delete option from the drop down menu to the right of the list's name.
-
Click the Yes button to delete the list.
-
Find the list you want to print.
-
Click on the list's name and then click the Download button.
-
Choose the format you want to download (PDF or CSV).
-
The list's printable version will appear and you can choose to download or print it.
Note: you can also choose the print option from the options menu (three horizontal lines) next to the list's name on the Lists page.
5. Publish a Post
The newsfeed is used to keep parents and staff members updated about what is happening at your institute. Staff members who have been granted access can post using the newsfeed.
Click on Write your post here
A pop-up window will appear where you can write your post and add attachments to it.
-
To: Select the recipients that can view the post from the drop-down menu.
-
-
Upload any files you want to attach to the post by clicking on the Upload Files button and selecting the files.
-
Once you are done click on Post.
** NOTE ** If you finished writing your Post and would like to save it for later as a draft, just click on the little arrow next to Post. You will receive a pop-up notification confirming saving this a draft.
If you want to roll out the previously drafted Posts
-
Click on Newsfeed, and then Post.
-
Tap on this icon within the post, and then you will find the drafted Posts in a new pop-up window. The number reflect the number of existing drafts.
-
Access the newsfeed by pressing the Newsfeed icon.
-
Press the + icon and choose Post.
-
Choose the recipients that will be able to view newsfeed posts.
-
Write what you want to tell users in the post.
-
Upload any files you want to attach to the post.
-
When you are finished, press Next
-
You will be then be given the choice to either Post directly or Save as draft
**NOTE** If you want to access previously drafted posts just click on the icon shown below, at the bottom of the post and you will see all available drafts that you can edit or publish. The number displayed reflects the number of drafts available.
6. Delete and/or Edit Holiday Feedback
To edit a holiday you created follow these steps:
-
From the list of holidays displayed click on the holiday you want to edit.
-
Click the options menu (3 horizontal dots)
-
You can now edit all the holiday fields. When you are done, click the Save button.
-
From the list of holidays displayed click on the holiday you want to delete.
-
Click the options menu (three horizontal dots)
-
A warning message will appear, click Yes to delete the holiday.
Click on the holiday you want to view replies for
A popup with the details will appear, you can filter the replies with Replied, and Didn't reply.
7. Create Surveys
Surveys will help you to create questionnaires so they can be sent out to children and staff.
Tap on Show under Surveys
Survey Title: Add a title for the survey
Recipient: Choose the recipient that you want to share with the survey.
Description: Add more details/ description of the survey.
Survey Type: Set the duration of the survey. You can choose to send it only once by selecting "One Time" or on a regular basis.
Start Date: Set the start date of the survey
End Date: Set the end date of the survey
Scheduled Survey: Schedule when would you like to conduct the survey upon arrival or at a specific time.
Share with parents: Choose to share the survey with the parents or not.
Questions: Add the question text, and also you can choose the type of question.
Once you are done, tap on Create.
8. Move, Share, Rename, and Delete the Documents
Click on the name of the institution in which you want to move, share, rename, or delete a folder in Documents Center.
Click on Show, under Documents.
Tap on the 3 dots right next to the folder you want to move, share, rename, or delete.
-
Select Share from the list.
-
Sharing Settings screen will pop-up
Search for Recipients: You can search for the recipients you want to share with them the folder/document.
Can View: You can choose whether the added recipient will view only or will have ownership of the folder/document.
Add: Click on Add after choosing the recipients and adjusting whether the recipient can view or have the ownership of the folder/document.
-
Select Move to from the list.
-
-
Select the desired folder, then click on Move
Rename a folder/ document
-
Select Rename from the list.
-
Rename Folder screen will pop-up.
-
Add the desired name of the folder, then click Save.
Delete a folder/ document
-
Select Delete from the list.
-
A pop-up message will appear.
-
Click Yes if you want to delete this folder/document.
9. WordPress Guide
WordPress Administration Screen
The Administration Screen provides access to the control features of your WordPress installation.
1- Welcome message – Some of the most important areas of the admin panel listed as quick shortcuts links – these are usually your shortcuts to how to make a website
2- The current status of your site and what’s going on with it
3- Posts – go here to create blog posts.
4- Media – upload/manage images and other media files here.
5- Pages – go here to create sub-pages.
6- Comments – this is where you can moderate comments.
7- Appearance – change your site’s design here and/or customize how certain things are displayed on the current design.
8- Plugins – install new plugins here.
9- Users – manage user accounts that can access the admin panel of the website.
10- Settings – the main settings.
At this stage, it’s good to take care of some basic getting-started WordPress settings that will improve your experience further down the road.
On this tab, you can change the Primary Color and Main layout style
On this tab, you can change the logo site
On this tab, you can change Header info like opening hours, email, phone, and address
On this tab, you can change the page title and subtitle
On this tab, you can change the content padding and background
On this tab, you can change heading and Body font, font size, and font style
On this tab, you can enable the footer and change the footer copyright
On this tab, you can add your social media links
On this tab, you can add a custom CSS and js and add Head link tags like google analytics or google tag
On this tab, you can import or export option file or code
1- Click on“Appearance” From the left-hand side menu and click on “Menus”
2- Click on “Create a New Menu”
3- Under the Menu structure, Type the Menu Name in the relevant bar.
To set the display location of the menu:
You have the option to choose the “Primary Menu” which will be in the header on top and you can select other locations. Once you select the location of the menu click on “Create Menu”.
You will be able to add items such as pages, posts, plus you can add custom links or any different category.
Select the items you need to add from the “Add Menu Items” on the left side and click on “Add to Menu”
How to Edit the Footer Widgets:
1- Click on “Appearance” from the left-hand side menu and click on widgets.
You will be able to edit the widgets of the footer such as changing the Parent logo on the left and its position plus also adding different social media links by clicking on Footer #1 column.
You can edit the text in the middle by clicking on Footer #2 column
1- Click on “Edit with Elementor”
2- Right click on the homepage slider to Edit.
You will be able to edit and change the image, the title, and the description on the slider picture. You can drag and drop the image directly into elementor. Click on the slider options to change the slider behavior.
Click on any Item on the homepage to edit and the options will appear on the left-hand sidebar.
You can edit any item on the page by simply clicking on it and changing its elements from the left-hand sidebar.
You can get more options for editing the slider by clicking on the three dots and you will be able to edit the layout, style, and more advanced settings of the slider
Click on “Basic” and simply drag and drop different items to the page and you will get the different settings of the item on the bar shown below.
So if you would like to create a button on your homepage, simply drag and drop the button option from the bar to the page and adjust the settings to your liking.
Click on the text you want to edit and click on “style” at the bottom you will find typography and you will be able to edit the text to your liking, you can edit the text styles, line spacing, text size, font, and color.
10. Create a Weekly Schedule
Plan the week and learn how to create a weekly schedule.
The weekly schedule allows you to plan the week or weeks ahead, also it can be created for the whole institution, specific classes, or even individuals.
Click on the name of the institution in which you want to create a weekly schedule.
You will be directed to a new page to add more details about the weekly schedule.
Recipients: Add the recipients whom you will share the weekly schedule with.
Date: The starting date of the weekly schedule.
Start time: Set the start time of the weekly schedule.
End time: Set the end time of the weekly schedule.
Title: Add a title of the weekly schedule.
Description: Here you can add more details/descriptions of the weekly schedule.
Reminder a day before: You can add a reminder a day before the weekly schedule by turning the toggle On.
Once you are done click on Create.
11. Delete an Activity in the Weekly Schedule
Log in to Parent account.
Click on the Calendar icon and you will be directed to the calendar page.
Once you are on the calendar page you will see the activities listed. Click on 3 dots next to the activity you want to delete and a pop window will appear.
A warning message will appear to click Yes if you want to delete the activity.
12. Inspirations Library
Learn more about the inspirations library and how it will help in the child development process
No one knows more about the child’s development than you. You know what works and what doesn’t, with each and every single child in your class. Now you can share your inspirations with other teachers in your institute or with all teachers that use Parent.
You can also use the inspirations feature to see what other teachers are doing in their own classes so you can apply them in your classroom.
Log in to your Parent account.
Tap on Show under Inspirations Library
Click on +New Inspiration
Select: You can select the inspiration photo cover.
Title: Add the title you want for the inspiration.
Age in Months: Add the age band suitable for this inspiration in months.
Related child development areas: Choose from the dropdown list what areas of development are related to the created inspiration.
What you'll need: Choose the tools needed to carry out the inspiration, or you can simply add a new tool/item by typing it directly.
Description: Add more details and descriptions (ex, steps on how to do, etc...)
Upload Files: You can upload videos, photos, or files.
Note: You can make this inspiration public to all Parent ApS users by clicking on Make it Public, or you can add this inspiration only for your institute by clicking on the mark right next to your institute name.
Once you are done, click Create.
13. Edit an Activity in the Weekly Schedule
Sometimes a planned activity changes and you need to edit an activity you added to the weekly schedule.
Here is how you can edit an activity.
Log in to Parent account.
Click on the Calendar icon and you will be directed to the calendar page.
-
Once you are on the calendar page you will see the activities listed.
-
Click the 3 horizontal dots next to the event you want to edit, then click Edit or tap on the event and then tap on Edit
-
The activity popup will appear and all fields are now editable, once you are done click Save.
14. Food Plan
Forget about adding the food plan manually, now you can add the entire week food schedule with a few easy steps
Tap on Show under Food Plan
-
Click on Meals, a pop up window will appear to add the meal name.
-
Click on +Add Meal, add the meal name.
-
Turn the toggle on if you would like to add this meal to your daily plan
-
Then click on Save. The meal will be added to your food plan meals list
Second, you create the food plan
-
Pick the date from the calendar
-
Click on +Create Food Plan
-
Add the meals for each day
-
Click on +Add Item, a new pop-up window will appear.
Tick the item you want to add to each meal, and then click Add
Also, you can simply add a new item by typing it directly, then click on Add
**Note:
If you would like to Repeat/Edit/Clear a certain week entirely, you can easily do that by choosing the week you want to Repeat/Edit/Clear.
Click on three dots right next to the week header, and choose the action you would like to apply to your institute food plan.
15. Apetito Integration
Login to your Parent Account
Click on the name of the institution to which you would like to add your menu.
Click on the Tools icon then select the Show button below the Integrations icon.
Choose the Apetito Integration option.
-
You will be directed to the Apetito account details page where you need to put your customer ID.
-
Your Parent and Apetito menu are now connected and you can start adding menus to your food plan.
16. Manage Waitlist
The waitlist will help you to schedule your institute tours, and log more details about new child registration requests, new employment, etc...
Use your username and password to log in to your Parent account.
-
Tap on Show under Waitlist
-
Add all the required details for both the Parent and Child.
Fill in the required fields.
Source: How did the parent apply for an inquiry
Booking Method: Pick from the dropdown list, how did the parent contact your institute
Reason: Choose the reason for applying for the inquiry request.
* If you would like to book a tour, just mark the tick right next to Book a Tour
-
Title: Add a title for the Tour
-
Staff: You can assign the tour to a specific staff member
-
Date: Add the date of the tour
-
Time: Add the time of the tour
-
Description: You can add more details/descriptions about the tour in this section.
Once you are done, click on Create. It will be added to your institute waitlists.
**Note: You can create a new public profile form.
17. Upload a Document
to upload a document and add it to the center of your document:
Click on Show, under Documents.
Then click on Upload Documents.
Choose the desired document, click on open. Once the document is uploaded you will receive a confirmation pop-up message.
18. Create a Folder
Click on Show, under Documents.
-
Add the desired name for the newly created folder, then click on Create Folder.
The new folder will be added to your Documents center files list.
19. Live Meetings
Now you can host live meetings right from your Parent newsfeed. To start a live meeting, follow these steps:
-
Click on the Newsfeed tab
-
-
Write your post to let people know about your live meeting/session
-
Add the recipients then click on Post
Once you have created the post follow these steps:
-
, then you will be directed to Zoom to start the meeting
Once you have started your meeting, the parents and staff members can use the link in the newsfeed to join your live session.
20. Create an Event
The calendar feature lets you easily create events, plan activities, and track your institute's planned schedule.
You can simply add events to the institute's calendar and the recipients you select will be notified.
There are two types of events:
-
One time event that occurs only once
-
In this article, we will show you how to create a one-time event.
Use your username and password to login to your Parent account.
Click on the name of the institution in which you want to create an event.
You will be directed to the Events page and you must fill in the required fields:
-
Event Title: add the name of your event.
-
Recipients: choose who will be able to view the event. For example, is this an event for the whole institution or just one class?
-
Select a date: choose the date of the event.
-
From: the event start time.
-
There are other fields that are not required but may be helpful:
-
Description: Description of the event. For example, you may want to describe what will happen during the event.
-
Reservation needed: Turn the toggle on if there is any reservation needed, also you can select whether this event is for Adults/Children or both from the Event for box, and you can set a deadline date for the replies in the Reply deadline box.
Reminder a day before event: Turn the toggle On if you want a reminder one day prior to the event.
Photo: upload or take a photo to share with recipients of the event.
Make it Zoom meeting: Turn the toggle on, If you would like this event to be online using Zoom.
Finally, click the Save button shown in the event popup and your event will show on the calendar.
21. Create Activities
Activities are classwork or homework that you would like children to carry out at home.
Tap on Show under Activities, then click on Create Activity
Recipients: Choose the recipients/class that you want to share with this activity.
Activity Title: Add the activity title/name (i.e.: coloring page, drawing,…)
Deadline: Select the deadline date for the activity.
Description: Add more details or descriptions of the activity.
You can also upload files along with the activity.
Once you are done, click Create.
22. Edit a Post
Log in to Parent account.
Click on the name of the institution in which you want to edit a post.
Scroll down to the post you want to edit, click the More Options menu (three horizontal dots). Then, choose Edit.
After you are done editing the post, click on Save.
Edit Newsfeed Post
-
Access the newsfeed by pressing the Newsfeed icon.
-
Find the post you want to edit and press the three dots on the upper right corner of the post. Then, choose Edit from the menu.
-
Edit the post and press the Post button when you are done.
23. Delete a Post
Log in to Parent account.
Click on the name of the institution in which you want to delete a post.
-
Find the post you want to delete and click the More Options menu (three horizontal dots).
-
Choose to delete the post.
-
A warning will appear to confirm that you want to delete the post.
-
-
Access the newsfeed by pressing the Newsfeed icon.
-
Find the post you want to delete and press the three dots on the upper right corner of the post. Then choose Delete from the menu.
-
A warning message will appear.
-
Press Yes, Delete to confirm.
24. Create Holidays
Forget about calls, SMS, and emails! Parent enables you to notify your children’s parents and staff members about upcoming holidays.
This feature lets you know how many children will be coming during the planned holiday so you can plan the number of staff you will need.
Click on the Tools icon and then click on the Show button below Holiday feedback.
To add a holiday follow these steps:
-
Click the +Create button.
-
Fill in the following required fields:
-
-
Description: Add more details about the holiday
-
Recipients: Select who will receive and respond to the holiday.
-
Date Range: Select the starting and ending date of the holiday
-
Reply deadline: the last day recipients can respond.
-
Request Dropoff: if this event requests drop-off and pick-up time, just turn the toggle on.
-
Send reminder before deadline: If you would like to send the parents a reminder for replies before the deadline date.
-
+Add: you can add as many reminders as you want before the reply deadline.
Once done, click on Create.
25. Edit an Event
Use your username and password to login into your Parent account.
Click on the name of the institution in which you want to edit an event.
From the calendar page, you will find a drop-down menu on the left side,
-
Click My Calendar to go to view your events.
-
Find the event you want to edit and click on it. You will be directed to the event's page.
-
-
You will be directed to the event's page.
You can now edit the event information you want and click Save.
26. Delete an Event
Log in to your Parent account.
Click on the Calendar icon and you will be directed to the calendar page.
-
From the calendar page click My Calendar tab to go to view your events.
-
Find the event you want to delete and click on it. You will be directed to the event's page.
-
A warning message will appear, click Yes if you want to delete the event.
27. Parent New Features Brush-Up Sessions
New features could be confusing at times, we understand and we are always happy to help. Easily book specific feature brush-up sessions for all your newly hired staff through the calendar below:
Book a meeting now!
Conclusion
Parent™ Childcare App is a game-changer for parents seeking a comprehensive and user-friendly tool to manage their child's early education and development. With its user-friendly interface, daily schedules and reminders, secure communication, attendance tracking, health monitoring, learning resources, financial management tools, collaboration features, data security, and accessibility, the app offers a holistic solution that simplifies and enhances the parenting experience. Parents are encouraged to try Parent™ Childcare App and discover the benefits it brings to their childcare journey.
FAQs
-
Can multiple parents have access to the same Childcare App account? Yes, Parent™ allows multiple parents to have access to the same account, ensuring that all caregivers can stay connected and informed.
-
Is Parent™ available in multiple languages? Yes, the app supports multiple languages, providing accessibility to parents from diverse linguistic backgrounds.
-
Are there any age restrictions for using the app? Parent™ is designed for parents of children in their early education and development stage, typically ranging from infancy to preschool age.
-
Can I customize the notifications and alerts on the app? Absolutely! The app allows parents to customize notifications and alerts according to their preferences, ensuring that they receive the information they find most important.
-
How secure is Parent™ in terms of data protection? Parent™ takes data security seriously. It employs robust encryption measures and complies with privacy regulations to safeguard user data and provide a secure environment for parents and their children.
Try Parent™ Childcare App today and embark on a seamless and enriching childcare journey. Experience the convenience, security, and comprehensive features that the app offers, and empower yourself as a parent to actively engage in your child's early education and development.

 Billing, Invoicing Automation & Smart Finances
 Communication & Engagement
 Child Development & Progress
 Waitlist, Forms & Attendance
 Effortless Team Management
 Daily Updates That Matter
 Blogs
Blogs
 Case Studies & Testimonials
 FAQs
FAQs
 Webinars
 Help Center